Case studies
typevs.me
A realtime head-to-head typing competition game.
Overview and motivation
typevs.me is a typing competition game: users are given the same prompt, and race to type it as quickly as possible. You can find versions of the same idea online (the most popular being TypeRacer). I was inspired to create my own typing competition because I had played TypeRacer with my friends and I felt the experience could be better. This project is also heavily inspired by MonkeyType, which only supports single-player typing tests. I loved the intuitive and minimal design of Monkeytype’s main typing interface, and wished typing competition websites had similar interfaces. I was also interested in learning how to work with WebSockets to create real-time web experiences, so this project was the perfect opportunity.
typevs.me has a feature set that includes:
- Realtime typing races
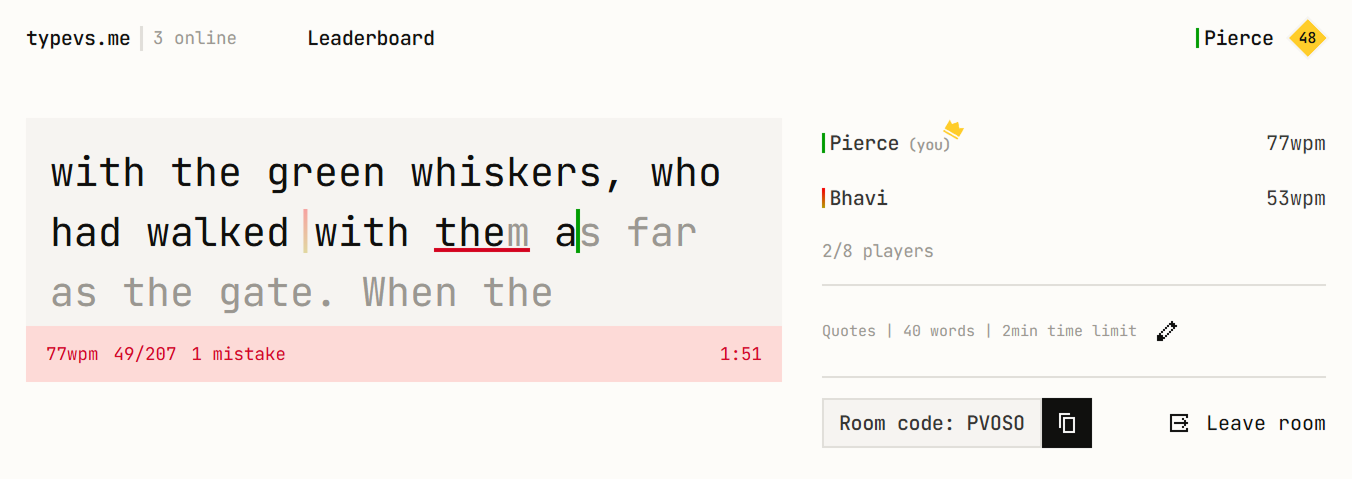
- Configurable races
- Source of words: top 100 English words, top 1000 English words, or quotes
- Number of words
- Time limit
- System for creating, inviting users to, and joining rooms
- Accounts that track all races played
- Profile page with statistics
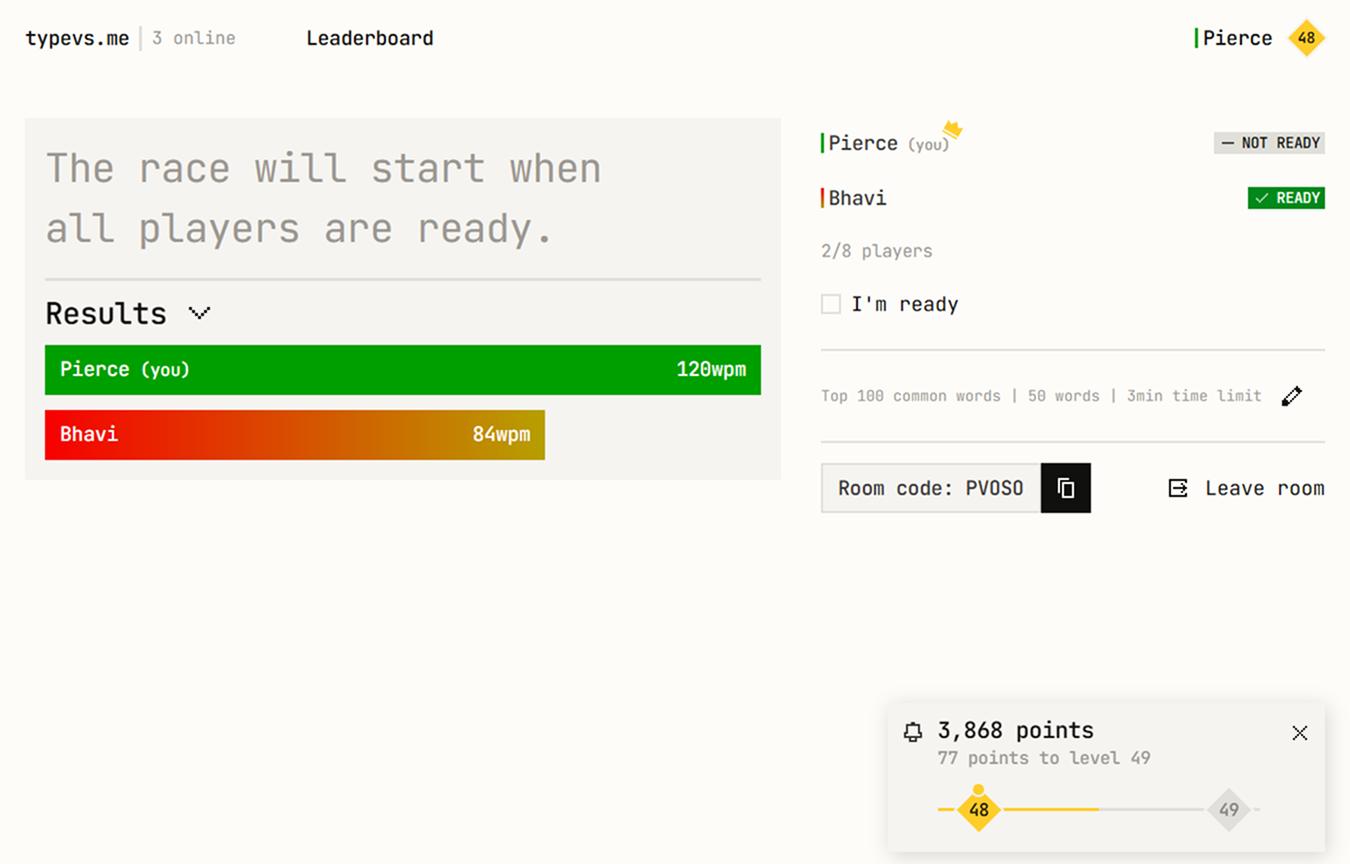
- A points and levels system with unlockable items
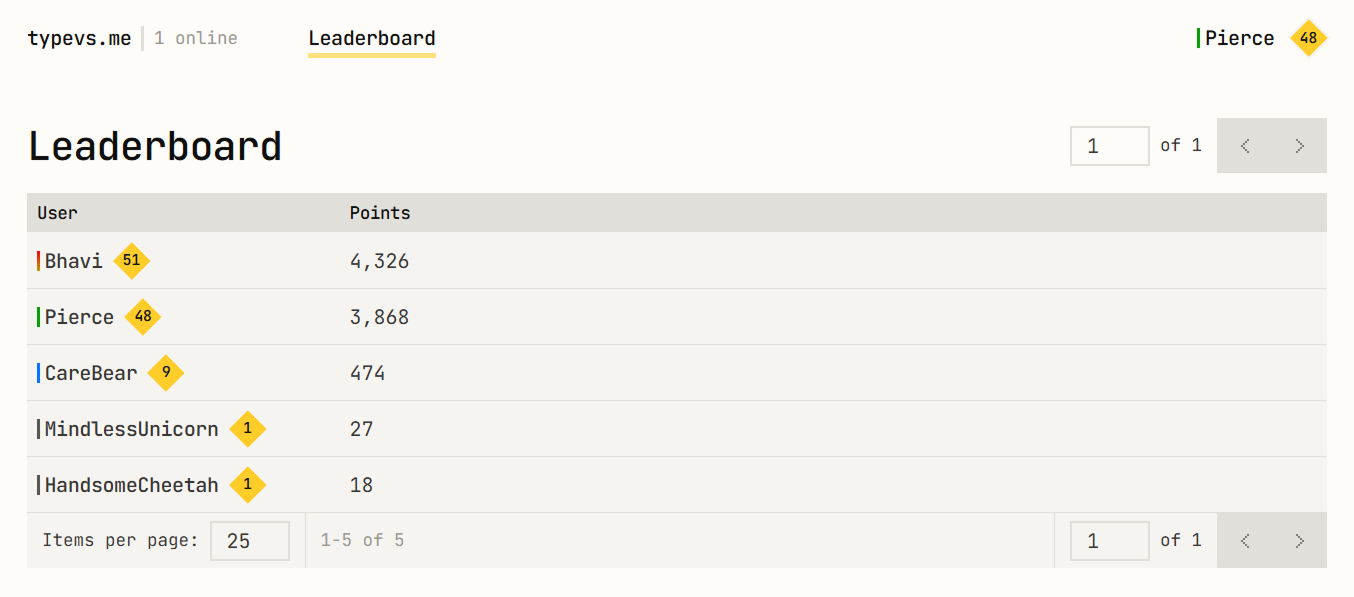
- An all-time points leaderboard
- Fine-tuned light and dark modes
- Opengraph images for sharing pages on social media
- Next.js
- Socket.io
- Prisma ORM
- Jest
- Supabase
- TypeScript
- SCSS
- Husky
- ESLint
- Prettier
- GitHub Actions
Process
Choosing a tech stack
For the frontend, I chose to use Next.js with TypeScript and SCSS modules. I went with Next.js mainly because I had used it briefly in the past and was aware of its capabilities. I knew its routing, server components, and server actions would be useful for a project with this scope. I used TypeScript (like I do in all of my projects) because it gives me much more confidence in my code working as expected. Finally, I used SCSS modules, since it gives me the full flexibility and power of CSS while scoping styles however I need.
For the backend, I used Node.js + Socket.io. I chose to create a separate Node.js server instead of integrating Socket.io directly with Next.js because I wanted to deploy with Vercel, which doesn’t support WebSocket connections. I also chose Socket.io because it appeared to be the most fully-featured and well-supported library for creating a WebSocket server.
Finally, I used PostgresQL, Prisma, and Auth.js to manage authentication and long-lived data, like race histories. I chose PostgresQL and Prisma because I wanted to try an ORM (previously, I had worked with the MongoDB API directly), and I had heard positive things about using them together. I also went with Auth.js simply because I needed authentication and it seemed like the “standard” choice.
Creating custom components
In the process of creating this project, I wrote several complex components from scratch. Many of these components were necessary to create myself—some didn’t have existing packages, while others had some, but they couldn’t be easily coerced to meet the visual requirements I set for myself.
Typer
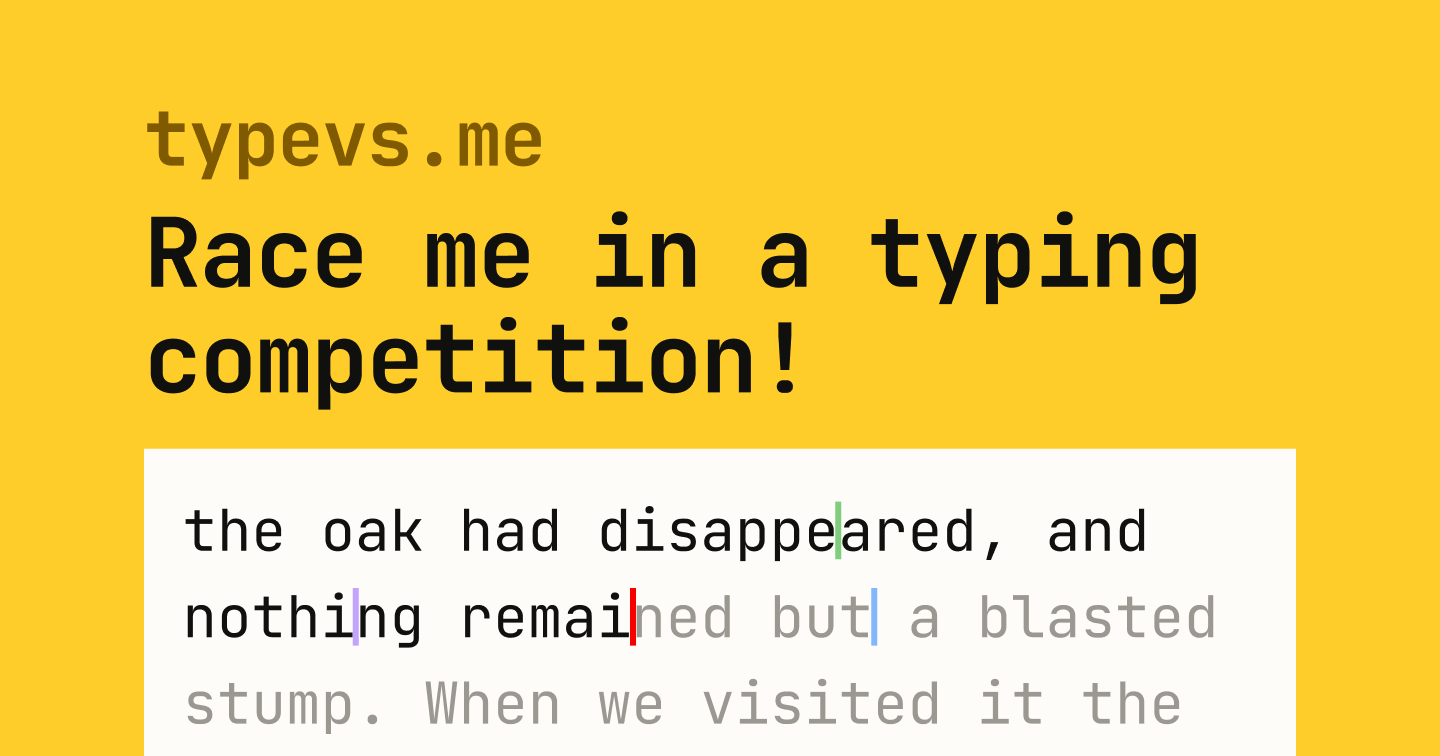
The first and most integral component I created for this project was the Typer component. This is the component that handles the primary typing interface. It handles placement of custom HTML cursors, automatic scrolling while typing, rich text styling comparing inputted text to expected text, and calculating typing statistics like accuracy and words per minute. It also uses a native input under the hood, allowing it to be accessible on mobile as well. Stylistically, it is heavily inspired by MonkeyType’s typing interface.
RangeSlider
This component allows for selecting a range using a slider with two handles. I needed this
component to filter results on profile pages by the number of words in races. This is not
natively supported by HTML, which only provides a single-handle slider. While there are
packages that handle this, I wanted to challenge myself to create my own accessible
solution. It supports customizable minimums, maximums and steps (the gap between selectable
values). It uses native drag events to support dragging the handles, keyboard events to
handle using arrow, home, and end keys to change the values. I
also made the target areas 44 pixels large to meet web accessibility standards.
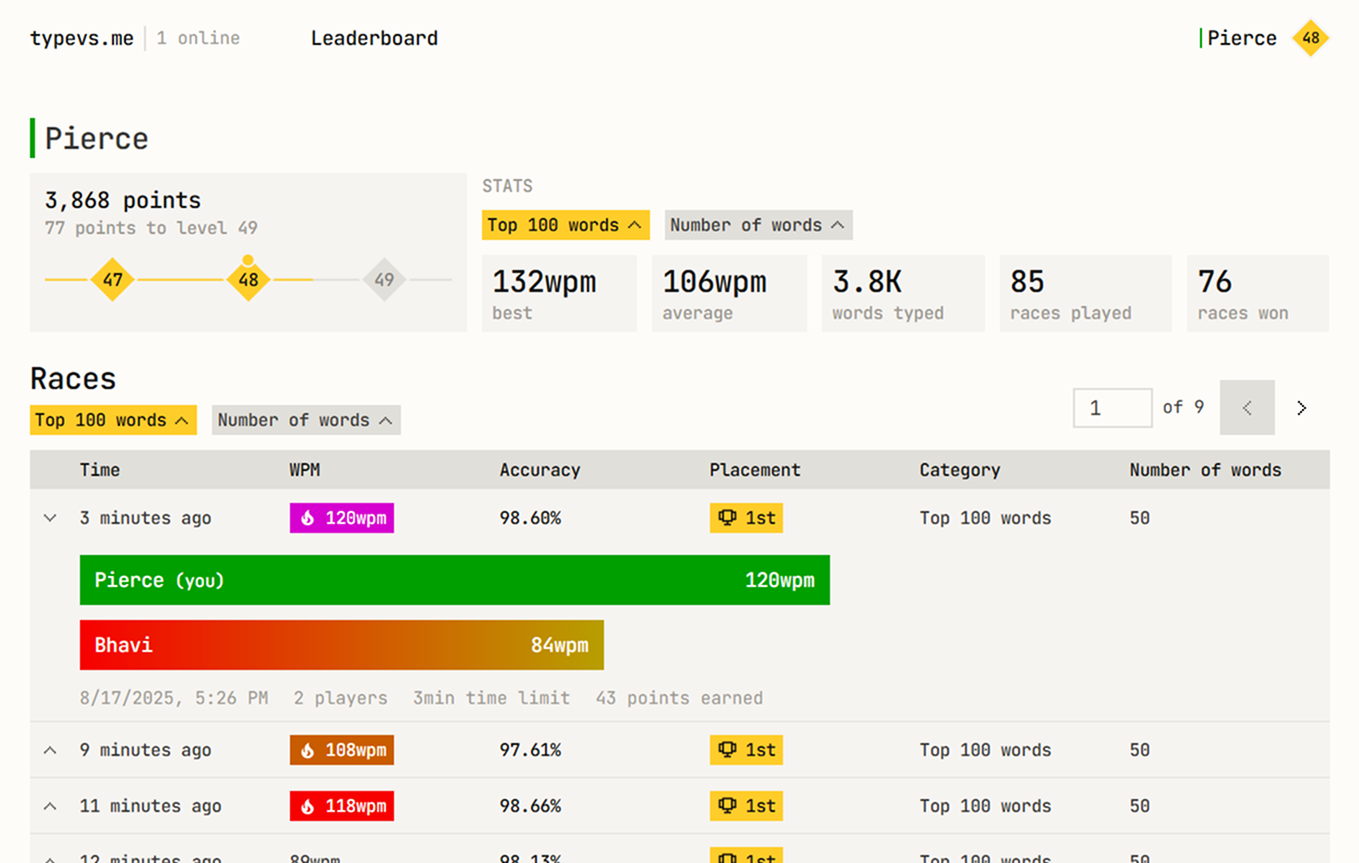
Table
This component allows presenting tabular data with expandable rows and full control over how content displays. I use it to display the leaderboard and race histories on user profiles. This is another component with existing solutions, however none that I could find supported my exact use case with expanding rows. I wanted expanding rows to display basic information about a race, while allowing a user to expand the full race details (including other users’ scores in the race). It uses TypeScript generics to get type safety across props, a render function for cells and expanding sections to arbitrarily render depending on data, and CSS subgrids instead of tables to maximize control of sizing.
Notification
This component displays one or many alerts to the user. I use it to display room alerts (like a player joining or leaving) and user level updates after finishing a race. It is unique from other toast/notification packages in its use of view transitions to animate notifications on and off of the page.
Designing the WebSocket server
At the core of the functionality of typevs.me is a WebSocket-based server. This server handles live room and race updates across users. Users take actions in their browser that are sent as events to the server, then the server relays the event to other users in the original user’s room as needed. Because a solid, well-organized server would mean a reliable user experience, I was thorough with my implementation. I started by diagramming logic in Figma, then I wrote events with their respective tests one-by-one.
To diagram the WebSocket server, I started by listing the realtime functionality I wanted to support. This included joining and leaving rooms, starting races, updating cursor positions, user changes, and room changes. Then, for each event, I diagrammed the logic the server would follow, and what events it would send out in response. This wasn’t a perfect process; as I implemented my logic, different issues arose that necessitated changes to the diagrams. However, by diagramming my expectations first, I gained a fine-grained understanding of the entire system that gave me clarity and minimized bugs.
As I implemented events, I also wrote respective tests with Jest. Once an event was fully test-covered, I moved to the next event. I chose to test as I implemented because (1) I wanted to guarantee my expectations of the central part of the app and (2) tests could help me guarantee my updates didn’t break old functionality when I found mistakes in my logic that required updates or added new functionality.

UI design process
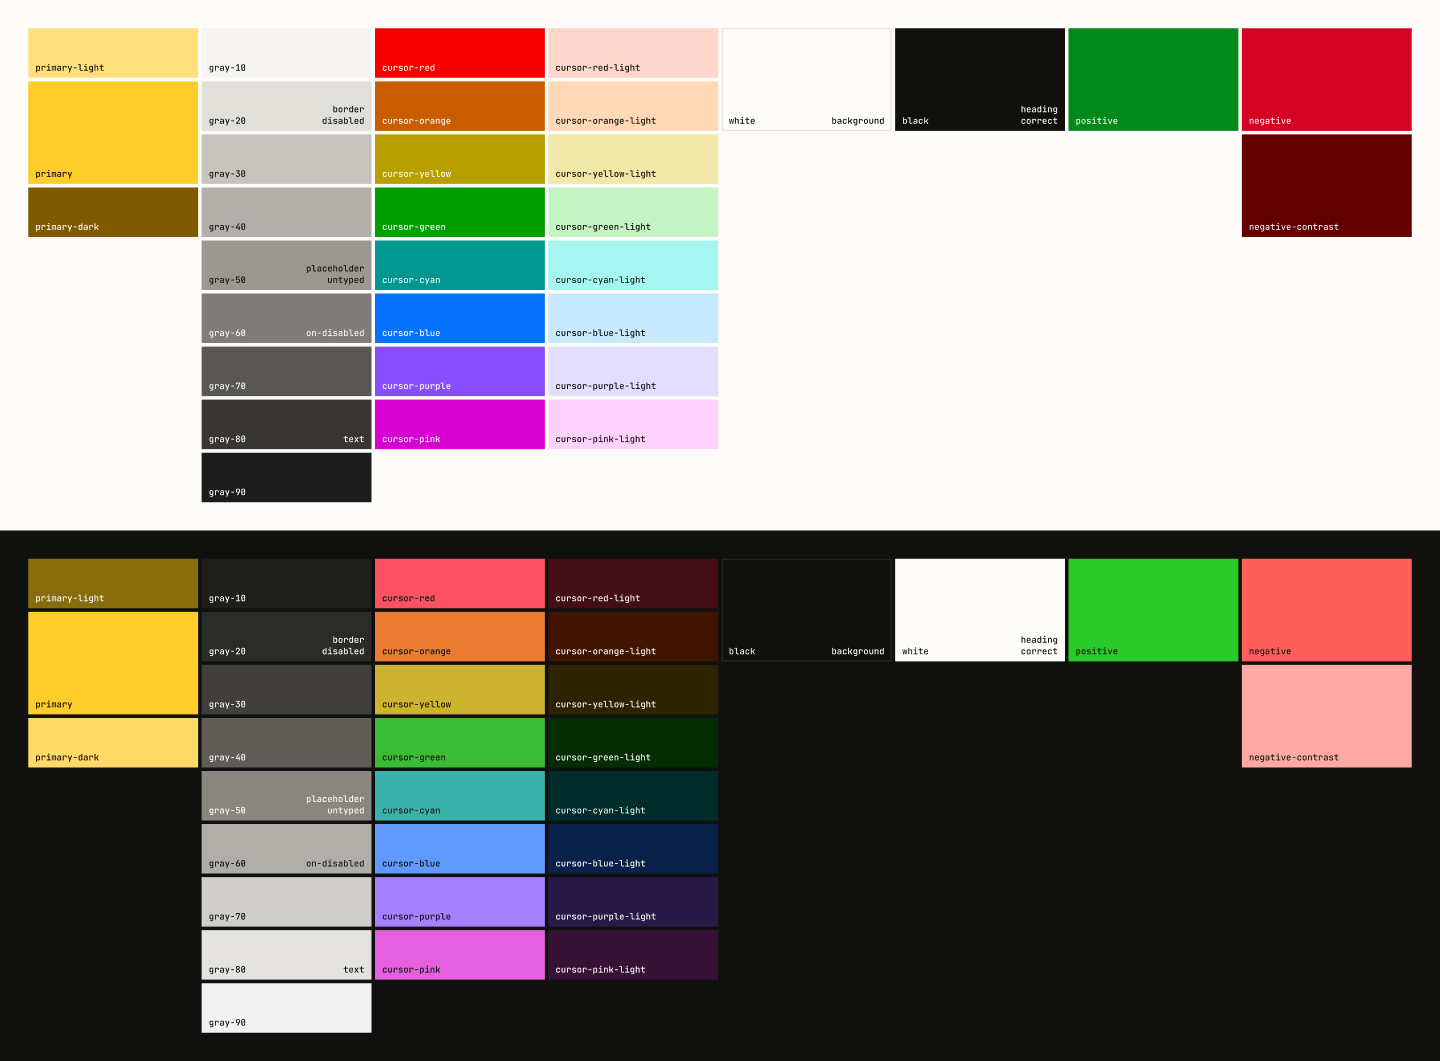
When designing the interface for typevs.me, I had several goals in mind. Firstly, I wanted
customizable cursors that were discernable and equally visible while not being distracting
when typing. To achieve this, I used the OKLCH color system. This system accounts for human
perception to create colors of different hues with predictable brightness. This is different
than more common color systems like RGB, where the brightness of a color isn’t simple to
predict from the value. For example, full-brightness yellow (#ffff00) and blue
(#0000ff) have very different perceived brightness, even though the colors are
both maximized in the RGB system. Using the OKLCH system for these colors, we can
immediately recognize they will have different brightness levels (0.968 for
yellow and 0.452 for blue). This was extremely helpful for my purposes, since I
just needed to set a lightness level, then adjust the hue to create cursor color variants.
My next goal was to make a simple, typing-focused interface. I felt that too much complexity would distract from typing. For example, when a race starts, I chose to hide the results from the previous race. I also intentionally place current user state (i.e. their current WPM/finished state) away from the typing interface.
Finally, I had a heavy focus on transition animations. Because I intended for a simple interface, I used transition animations to bring polish and continuity to the app. I use transitions for notifications, user states in rooms, cursor positions, collapsing race results, and more.

DevOps
I also used this project as a learning ground for how to automate processes for myself. I use Husky and lint-staged with ESLint and Prettier to automatically lint, format, and test my code on every commit. This helps me ensure code standards and quality. I also use GitHub Actions to migrate my database when pushing new code to the master branch, ensuring my database stays up-to-date with the app. Finally, I use Vercel and Render as deployment platforms, which automatically publish when I push new code to the master branch.
Insights
While working on this project, I expanded my breadth of knowledge of web development by using a lot of tools for the first time. Most significantly, this was my first time using Next.js for a full project. I learned how to use server components and the Suspense API with URL search params to build a profile page that maintains filter state in the URL, while displaying loading and updating states during fetching.
This was also my first experience with WebSockets. As opposed to a typical REST API, the server can also send events to the client. I learned how to leverage this model to build realtime applications that aren’t possible with REST APIs.
Additionally, I learned how to create the website previews you see when sharing on messaging apps and social media. These previews are handled by the Open Graph protocol, which is supported by Next.js. This preview is particularly useful for this game, which is likely to be shared (i.e. sending room links, sharing profiles).
Finally, this project reinforced the value of architecting ideas before implementation. Creating diagrams for the WebSocket server helped me minimize the iterations I needed to create a solid system.